Deposit into a Turtle vault, deposit with any token you hold, handle a pending request, and withdraw, all from the Turtle app.
This page walks you through putting funds into a vault and taking them back out, entirely from the Turtle app. No code. If you want to do the same thing from your own backend, the deposit endpoint covers it programmatically; there is a link at the bottom.
You need three things in place before you deposit.
A connected wallet
Any self-custody wallet you control. Turtle never holds your funds; it builds each transaction and you sign it from your wallet. Use the wallet button in the top right of the app to connect.
A supported chain
Your funds and your wallet should be on the chain the vault lives on. Each opportunity page shows the chain in its header. If your wallet is on a different network, the deposit button reads Switch chain; click it to switch. See the chain list on the Yield Opportunities overview.
Membership, if the vault requires it
Some flows require your wallet to be a registered Turtle member before a deposit goes through. The app prompts you to register if it is needed.
Go to app.turtle.xyz and connect the wallet you want to deposit from. The app opens on the Earn page.
2
Find a vault
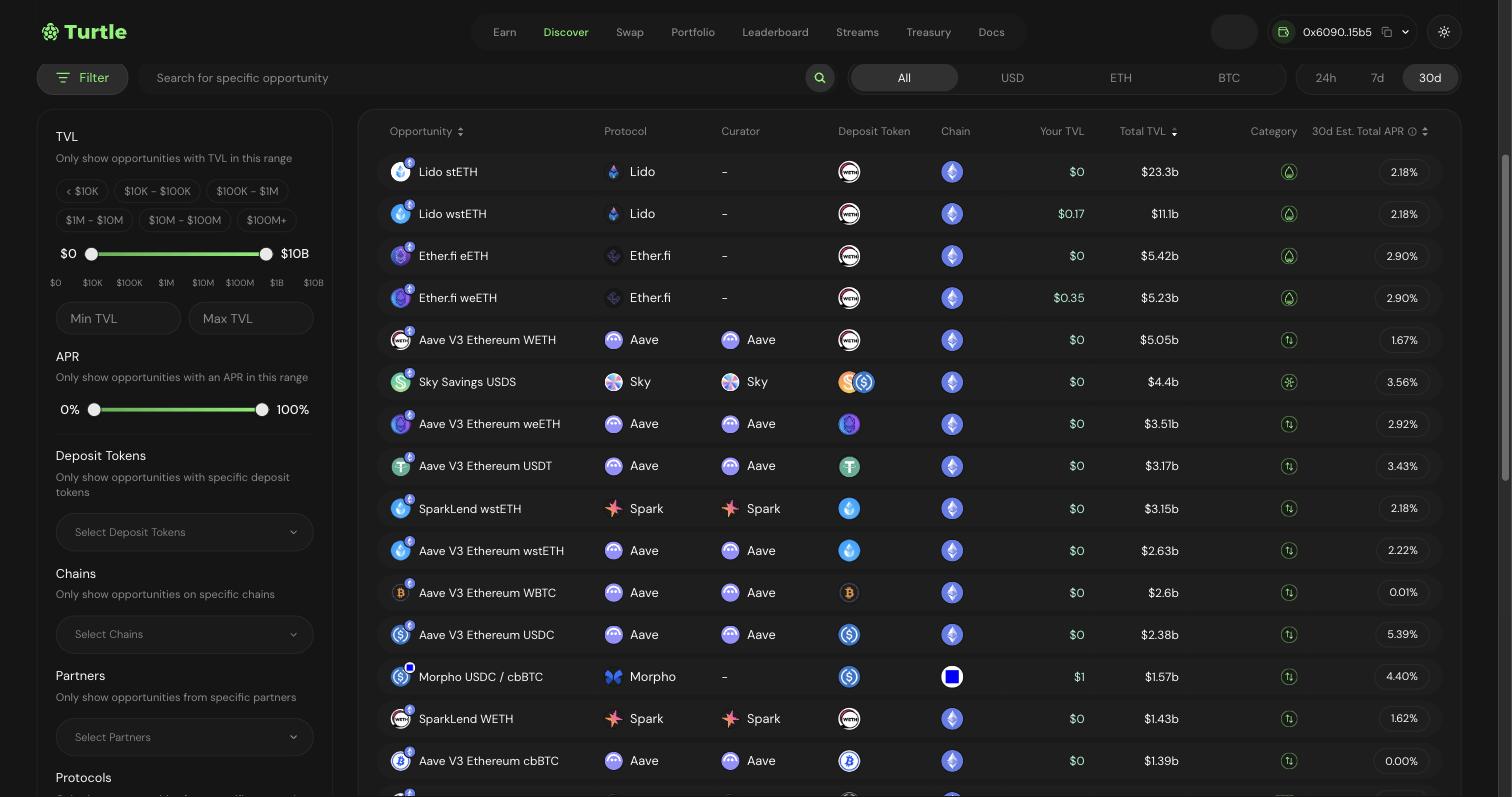
Reviewed Turtle Deals are on the Earn page. The full catalog is on the Discover page. Use the search box, the All / USD / ETH / BTC toggle, or the Filter panel (TVL, APR, Deposit Tokens, Chains, Partners, Protocols, Category) to narrow the list. Click a row to open the opportunity page.
The Discover catalog with the filter panel open.
On the opportunity page, a badge in the header (for example, Turtle Shells Stream) shows that a stream pays rewards on this vault. The Incentive Streams table lower on the page lists each stream, its reward asset, type, schedule, and estimated reward rate.
3
Choose your deposit token and amount
The Deposit panel sits on the right of the Overview tab. Pick the token with the selector in the top right of the panel, then enter an amount or click MAX. If you hold the vault’s native token, deposit it directly. If you hold a different token, the app can convert it for you as part of the deposit (see Deposit with any token below).
The deposit panel breaks the estimated APR into its sources.
The Source / Est. APR list in the panel shows each part of the rate: the vault’s Native Yield plus each active stream. Est. monthly earnings updates as you type. Stream rewards are tracked separately from the vault balance. See Track your rewards.
4
Approve and confirm
Click the deposit button. Approve the token spend if your wallet prompts for it, then confirm the deposit. Your wallet signs; the funds move on-chain to the vault.
5
See your position
Open the Your Position tab on the opportunity page. It shows your current value, receipt balance, estimated annual yield, and vault share. The same position also appears in your Portfolio under Positions, with a Manage button that returns you to this tab.For an instant vault, your position is active right away. For an async vault, the request may still be pending; see When a request completes later.
You do not have to hold a vault’s native token to deposit into it. If you hold a different supported token, the app converts it for you in the same flow: you choose the token you have from the selector in the deposit panel, and Turtle routes the swap before the deposit lands. You end up with a position in the vault, having spent the token you started with.This is the same capability the API calls swap mode. As an LP, all it means is one fewer step: deposit with what is in your wallet instead of swapping first yourself.
A conversion is subject to slippage, the small price movement between quote and execution. The app shows the expected result before you confirm.
Some vaults (the async type, used by protocols like Mellow and Lagoon) do not settle a deposit or a withdrawal in one transaction. The vault queues your request and processes it a little later. You can tell an async vault apart on the opportunity page: the vault details list a Withdrawal time (for example, 36 hours), and the withdraw panel reads “Submitting this transaction queues a redemption request. The operator delivers the underlying tokens later.”While a request is pending, it appears under Pending requests at the bottom of the Your Position tab. From there you have two choices:
Claim it once the vault has processed it, to finish the deposit and activate your position (or to receive your withdrawn funds).
Cancel it if you change your mind before it settles, to get your funds back.
If you recently deposited or withdrew, wait a few minutes for the request to appear. Deposit and withdrawal times are approximate and vary with the vault strategy and available liquidity.
Go to Portfolio, find the vault under Positions, and click Manage. This opens the Your Position tab of the opportunity page. You can also open the opportunity page directly and click the Your Position tab.
The Your Position tab with the withdraw panel on the right.
2
Enter an amount and confirm
The Withdraw panel is on the right. Enter an amount or click MAX, then confirm. Your wallet signs the transaction. The panel shows the terms before you sign: the withdrawal type (On-chain for instant vaults, or a Redemption time for async vaults) and the withdrawal fee.
3
Receive your funds
For an instant vault, funds return to your wallet when the transaction confirms. For an async vault, the withdrawal is queued as a redemption request; the operator delivers the underlying tokens after the redemption time. Track it under Pending requests on the same tab.